Clearly, being an international Revit-man of mystery doesn't leave much time for providing you with Revit recipes for greatness or otherwise. It makes sense to this humble institution to search for additional blog contributors. If you are interested in contributing and helping other Reviteers with tips, tricks, fun facts, and the like, then contact me. Compensation is an astounding amount of personal growth and maybe even a sense of accomplishment, which is priceless.
Wednesday, December 2, 2009
Wednesday, October 21, 2009
ACADIA 09 and Grasshopper to Revit
Chicago, October 21st, 2009
The ACADIA conference begins tomorrow. The advanced digital design tool workshops preceding the conference end today. Several of the workshops were cancelled including the ones I had registered for but a colleague of mine participated in the Rhino Grasshopper workshop which I am now regretting not signing up for as the results were impressive. Rhino plays nice with Revit. Grasshopper is a plugin if you weren’t aware and it has matured a bit since last year’s ACADIA. It is similar to Generative Components in many ways but the interface is far more useable and the community that is forming behind it is can’t be compared.
KlingStubbins will be using Rhino as a result of this workshop and incorporating it into the Revit workflow in our offices where possible. The link between Rhino and Revit remains critical in Architectural design firms as Revit is the BIM platform of choice by up to 98% of firms in various adoption statistics. As always and with any application, there are certain limitations and/or best practices when interfacing another application with Revit and it is never as simple as one would hope. That being said, the flexibility of Rhino allows for a pretty tight fit in my opinion. I haven’t mentioned the Concept design environment in Revit yet. It is a good tool and I look forward to the release and update of Revit 2011 (or the subscription pack this year) where it may be enhanced. Much of what you can do in Grasshopper can be achieved in Revit CDE but the interface of the former allows for a much more efficient workflow for design. Will we see slide controls for parameters in Revit? Time will tell.
Cheers,
Craig Barbieri
Tuesday, August 11, 2009
Hatching Revit Patterns for Filled Regions
Anxiously anticipating the opening of registration for Autodesk University fills the air with an excitement and flurry of optimism, wouldn’t you agree? In that spirit, here’s a helpful tip for all those who aren’t completely satisfied with the patterns available in Revit out of the box or often find yourselves looking for something particular in a pattern.
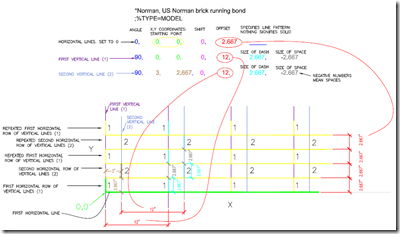
Above is a diagram of how to decode a pattern file (.pat) and even create your own with only a text editor like Notepad.exe, and a little verve. Now I can’t claim credit for this diagram and if I knew where or who it originated from I would happily credit the creative craftsman. Recently I was looking on AUGI for this diagram which I originally found there many years ago when I had come across the need for an unusual pattern. I did not find the original post which inspired me to search the great iRevit Archives and did happen across the file in my trunk of Revit nick-nacks and here it is.
If you can follow it, and don’t feel bad if you have trouble with it as many do, you can create your own patterns for Revit.
It basically follows some simple rules.
- Use the Inch and Degree as the units of measure
- The * in the first line is where you’ll put the pattern name
- The ;%TYPE=MODEL or alternatively ;%TYPE=DRAFTING informs Revit whether it is a Model or drafting pattern
- Then just do the numbers in sequence, beginning at 0,0
Here’s an example of the contents of a pattern I made that is
72” x 24” panels staggered by 24”:
*Panel-Stagger-72x24,Pattern-Staggered-72x24in
;%TYPE=MODEL
0,0,0,0,24
90,0,0,0,72,24,-24
90,24,24,0,72,24,-24
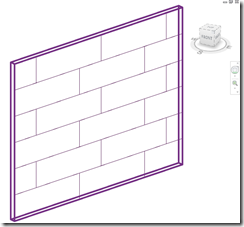
And this pattern materializes like so:
Once you have created your string of numbers to describe your pattern in a text file, you then save your pattern with the .pat extension instead of the .txt extension. You may have to switch the “Save as type” option in the save dialog to “*.* All Files”
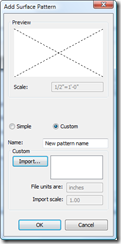
Loading this pattern is a matter of clicking the Manage tab, then the Settings button and selecting Fill Patterns then proceeding by selecting the type of pattern you want [Model/Drafting] and clicking New. The dialog that pops up allows you to create simple patterns but elaborate patterns require you to click the Custom button and Import the .pat file you created.
The Preview window is somewhat useless for large patterns as they don’t fit and the window is not resizable, but no matter. Your pattern is sure to look splendid. It is worth noting that now is the only opportunity you will have to change the scale of the pattern you create without re-importing the pattern file. The Import Scale will be grayed out after you click OK.
And that’s that.
Cheers,
Craig Barbieri

Sunday, July 19, 2009
Stuff you’ve seen here
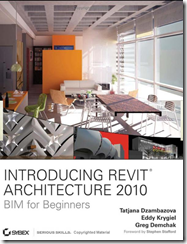
I am very excited to tell you that stuff you’ve seen here in this blog has been immortalized in the greatest known library in our universe, the Library of Congress in the USA. The book I refer to is Introducing Revit Architecture 2010: BIM for Beginners and although I did not write it, you’ll find one of my images on the cover! Written by Tatjana Dzambazova, Eddy Krygiel, and Greg Demchak, the book provides a thorough introduction to Revit and BIM and includes Revit’s capabilities, smart workflows, best practices, secrets, and tips among many other things. It is a very well-rounded book for those of you who are beginning to use Revit, and the book will benefit even those who have been using Revit for a while. In the center is a color section showing some inspiring work from folks from around the world. Some of my colleagues at KlingStubbins have the pleasure of showing their Revit design board for an Ops Center in Equador, in the soft gooey color center of the book. You’ll also see the Design slam ‘08 images from below printed in high fidelity.
Another book by the same three authors takes a more in-depth look at Revit and attempts to get the reader to a “Revit Master” level of expertise. Mastering Revit Architecture 2010 is a very good resource for both beginners and experienced Reviteers. The book takes a clear look at the new Concept Design tool and workflows that…work. Something of a Revit Bible, MRA2010 is a valuable tool for the new era of Architecture and BIM and IPD that we are a part of.
If you are starting to learn Revit, I highly recommend these books. Naturally I am a little biased because my work is on the cover of the first but in all honesty I would have loved to have these two books when I started to learn Revit many years ago.
Cheers,
Craig Barbieri
P.S. It' has been a while since I last posted and if you like excuses, it’s because of a thorough commitment to my firm’s, KlingStubbins’ successful and final migration to Revit in Architecture, Structure, and MEP at the end of this year. I have also been distracted by my wife and her business which is launching a new line of fabrics with her patterns very soon.
Sunday, April 26, 2009
Revit 2010 Ribbon development
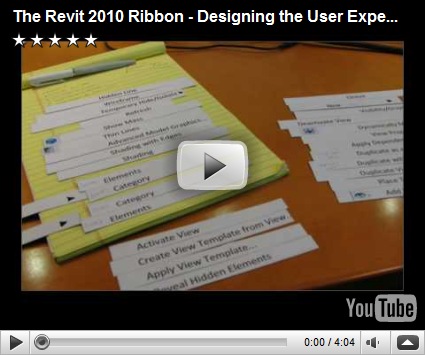
There has been much discussion and blogging about the new ribbon interface in the latest edition of Autodesk’s Revit platform. To get a little back story, watch this video on it’s development and the thought behind it. Even after testing and bug-hunting RAC2010 for 4 months, I still have trouble finding some of the commands I want. Granted, I’ve been using Revit for a while now, I think since 2002 or 2003, and the “old” UI is second nature to me. After watching the new ribbon interface video, I was a bit more comfortable. It points out that you can move the buttons around within each tab and add them to the quick-access toolbar. You can also dismount the tools and have them sit on a second monitor if you prefer. The fact that the tools have moved around quite a bit takes some getting used to. A really useful tool I found to help one adapt to the ribbon is the “Where is my Command” button on the help bar drop-down.
In terms of performance, certain aspects seem faster and others not so much. There is a Performance Technical whitepaper here which can help you with this regard. For those of us who work on large, multidiscipline, multi-office projects, you might see some performance boost here and there as it is making more use of 64-bit and multi-threading. In the end it is still mainly a single-threaded application so having a 16-core beast on your desk won’t help you crunch the database any faster.
The ribbon’s performance is still slow. It seems faster than when I was first introduced to it in January, but there still seems to be a split second delay in the reconfiguration of the panels between activities. In my mind, this is a critical functionality that needs a resolution. Delays in this reconfiguration process during modeling and drafting get very frustrating. If anyone knows a way of speeding this up, drop me line.
All in all I like the look and the flexibility that is provided in the ribbon but I would like to see more flexibility added. I like the functionality of the tools reconfiguring to the related tools of the selected subject. I find this very useful and it makes the application more intuitive. I would like to configure the tabs myself. I find certain Revit activities use a different array of tools more frequently than the “typical” Reviteer layout that exists. I find myself switching through the tabs quite a bit during the kinds of things I do which are not springing to mind right now otherwise I would list these activities.
The bummer of it all is that my firm now has the job of retraining a lot of people on how to interact with and use Revit. A job that I would rather not have to do. Revit and Building Information Modeling is a freight-train plowing through the beach chairs of the Architecture, Design and Construction industry and there’s one thing that I am certain about; and that is change in this aspect of the industry is becoming more frequent and more viral – not effecting just architects, but engineers, contractors and everyone that is connected. More often than not, change is good. Change expands the mind. Change revitalizes stagnant industries and creates new ones. And from a simple post about a new interface to the paternal application we have gotten into a philosophical diatribe on change. I didn’t see that coming.
Cheers,
Craig Barbieri
Saturday, April 11, 2009
Are you Laid-Off or a Displaced Worker?
| An awesome coincidence happened to me on Thursday. I received an email from a friend I worked with a few years ago at another Architecture firm. He was out of work, laid off, a “displaced worker” as some would put it. He had gotten a small drafting job and and his email was a request. Not being tech savvy, his computer was about 7 years old, and had the hardware specs and software to match. He needed me to convert an AutoCAD 2007 drawing to the older format of AutoCAD 2000 so he could work on it. “Not a problem,” I said, “I’d be happy to do it. But I have something even better for you…”. As it turns out, that morning I’d received an email from Autodesk University Online. Coincidentally, Autodesk has launched a new program to help displaced workers by offering software, training, and more! I shared this information with my friend, and I pass it on to you below: Autodesk Assistance Program Offers Help to Displaced Workers |
| Dear Craig, |
| In these uncertain economic times, many companies have had to let good people go. If you were one of them, you might be wondering how to advance your career in this challenging global job market. Invest in Yourself
Seize the opportunity now. Don't just survive—thrive! Sign up today for the Autodesk Assistance Program to access software, training, and certification. PS. Don't forget all the great resources available free on AU Online: access to hundreds of classes from past AU events, networking with other professionals, and more. Make plans now to be part of AU 2009 Las Vegas , where the classes, labs, and interaction with industry experts will prepare you for certification exams available there, and help you get ahead in the workplace. *Free products are subject to the terms and conditions of the end-user license agreement that accompanies the software. Autodesk, AutoCAD, Autodesk Inventor, ATC, Civil 3D, Inventor and Revit are registered trademarks or trademarks of Autodesk, Inc., and/or its subsidiaries and/or affiliates in the USA and/or other countries. All other brand names, product names, or trademarks belong to their respective holders. Autodesk reserves the right to alter product offerings and specifications at any time without notice, and is not responsible for typographical or graphical errors that may appear in this document. © 2009 Autodesk, Inc. All rights reserved. |
An awesome coincidence, yes? I haven’t heard from my friend since then so I’m guessing either he is as happy as a clam and busily working away or he hates me because his 7-year-old computer blew a fuse trying to load all the high-tech software!
Autodesk’s Assistance Program says a lot of good things about the company and the wisdom of the company’s leadership
(If you want to hire my friend, shoot me an email and I’ll get you in tough with him)
Enjoy! –Craig Barbieri
Thursday, February 19, 2009
Exercises in Erwin Hauer
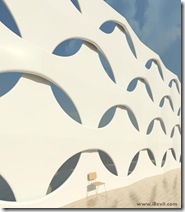
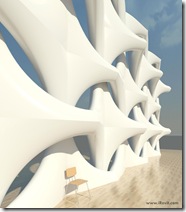
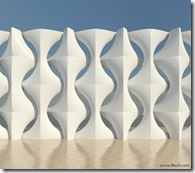
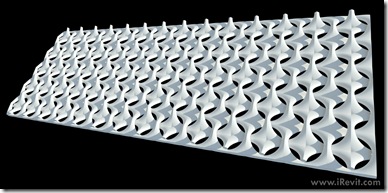
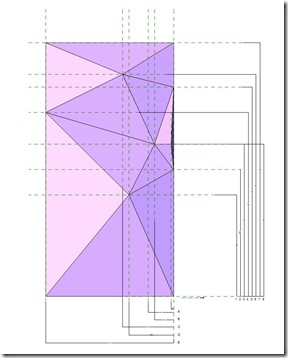
A study of Hauer’s ‘Design 3’ at core.form-ula breaks down the panelization of the design into manageable pieces. It is worth a look if you are interested in the architecture. The images below are another rendition of the Hauer panels (Design 3) inspired by the information on core.form-ula. This exercise takes it a step further with more flexibility in parametric definition i.e. the panel mass and crest/trough depth is adjustable. These images are created in Revit 2009 from the same panel component family. The hardest part of these panels systems is understanding how to make them repeatable, which ends up being a combination of mirroring along different axis. Over the past month the reviewing and testing of the alpha release of Revit 2010 has been occupying much time. There may be significant changes to how one might create a panel system such as the Hauer panels. There are some exciting enhancements and the release date will provide an opportunity to share some of this with you.
On another topic…
The Co.d.ex Project link above is a cool drawing exchange project that is worth keeping tabs on. There’s not much to see yet as the project is just starting off and the first drawing is being mailed to one of the participants Monday 02/23/2009. codexproject.blogspot.com
- Craig Barbieri
Thursday, January 22, 2009
Facets (cont’d)
Happy New Year folks!
I thought I would add this other facet component for you… This one is far more flexible. The real-deal of this family is far more complex but this one gets the idea across good enough. Take it for a spin:
An issue with working in a faceted facade is that it is necessary to re-align pretty much all of the curtain grids if you want the grids to remain perpendicular/horizontal. They have a tendency to align themselves how they please. Does anyone know how the curtain grids decide to base their grid orientation?


